Pages

Monday, November 30, 2009

Post Thanksgiving Post

Where has the time gone? Where has the year gone? Tomorrow is the first day of December which means in only 32 days it will be 2010. I just can't seem to wrap my mind around it. I've been plugging along, making my Christmas Cards and even photographing them but I just haven't been keeping up with this blog. No shopping or decorating and, usually a night owl, I've been going to bed by 8:30. Weird!

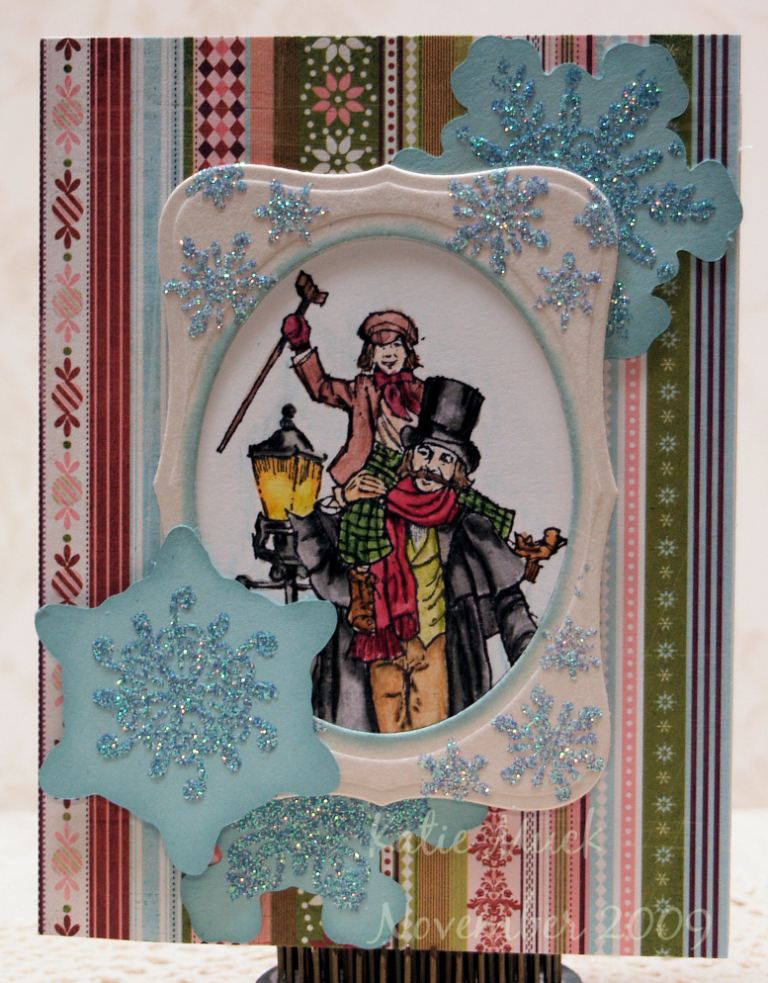
So here is the second of 14 different card designs I've done. I tried to make it clean and simple but it just didn't work out.


Til next time...


Stamps: Papertrey Ink - Peaceful Poinsettia; Signature Christmas

Paper: SU Real Red, Old Olive, Whisper White, Soft Sky; Basic Gray Eskimo Kisses

Ink: Real Red, Old Olice, Soft Sky, Groovy Guava

Other: Martha Stewart Border & Corner Punches; Spellbinders Labels One, Plain Circles, Fancy Labels; Cuttlebug Embossing Folder; Sakura Stardust Copper Pen

Thursday, November 19, 2009

A Dickens of a Time

I had a card all planned in my head. I would stamp snowflakes, cut them out, add glitter and use them as embellishments. It was going to be a great card except my hand wouldn't cooperate so I couldn't cut the snowflakes out. I have a Slice but the snowflakes are lacy so I couldn't stamp on them or so I thought. Then I remembered that Mistletoe is a new MS+ design card which means that I can cut shadows with it. Oh how I love my Slice and my hands do too.
I cut 3 different snowflake shadows in the 2 inch size from the Soft Sky cardstock, stamped the snowflakes with the Glue Pad, placed them face down on the glitter and then ran a 2 inch brayer over them to make sure the glitter was well smashed into the glue.
I cut and embossed the frame out of Ellen Hutsons Craft-A-Board using the Spellbinders dies, sponged some Soft Sky ink around the oval opening, stamped with the glue pad and smashed into the glitter.
I stamped my focal point onto the Neenah Classic Crest with Archival Ink. Once it was completely dry I colored with my watercolor pencils then used my aquapainter to blend the colors.
When doing the final assembly I used a few dimentionals here and there to keep everything level where necessary .

Til next time...

Stamps: SU Keep Christmas, Serene Snowflakes, Winter Post

Paper: Basic Grey 6x6 Paper Pad (Eskimo Kisses); SU Soft Sky; Ellen Hutson Craft-A-Board; Neenah Classic Crest Natural White

Ink: SU Soft Sky; Archival Jet Black

Other: Making Memories - Slice, Mistletoe Design Card; Spellbinders - Labels Eight, Plain Ovals; The Essential Glue Pad; Blue Pastel Glitter (?); Staedtler Karat Aquarelle Watercolor Pencils; Aqua painter

Wednesday, November 11, 2009

Tis That Season

No it's not "The Season" yet but it's that season between Halloween and Thanksgiving when I put my nose to the grindstone and start cranking out my Christmas cards. I've managed to finish 4 different designs so far. Normally I do about 6 different designs in multiples of 8 but this year I came up with so many ideas that I am making 2 of each until my mind runs dry and then I'll make more of my favorites.

It all begins with a sketch. I toss all the newest stamps, papers, ribbons, dies, embossing folders etc. onto my workbench then pick up my pencil and my notebook and sketch out what I am going to do with it all. I add notations as to which stamp, paper or whatever I have in mind for each particular sketch because nothing is more frustrating then having a whole project worked out in my head only to have it gone the next time I open my book and look at the sketch.

As I actually create the card, I record measurements, colors, supplies etc. on the sketch in case I want to recreate it later. I use scratch paper from my printer when testing dimentions so I don't waste any of the good stuff or at least that is the plan. It doesn't always work that way. I took this photo just to show everyone that my work area does get messy. It doesn't always look like it does here.

Here I am testing a layout before I actually apply the adhesive just in case I need to do any last minute adjustments. Those are my thumb braces to the left of the layout board. They aren't doing much good sitting there instead of being on my hands. Looks like I'll be getting my money's worth when I have my surgery in January.

Til next time...

Friday, November 6, 2009

Harvest Blessings

Here is another card made in September that never made it to the blog. I think because my Mojo went Walkabout in September and my cards showed it. I used Verve's Harvest Blessings stamp set and SEI's Mimosa paper with a bit of ribbon from my stash. Here is proof that you can have beautiful stamps and beautiful paper and still end up with a lousy card. The wreath was stamped in brown and colored with Prismacolor markers but you can't see the shading because the markers bled too much on the SEI paper.


Til next time...

Thursday, November 5, 2009

Scoring Techniques

I wasn't feeling too well the night of October's Card Club meeting so I stayed home. If I was coming down with something I didn't want to spread it to the rest of the group and besides, my SU Demo is one of my closest friends. By Saturday I was feeling fine and she needed to use my sewing machine so she just brought everything I needed to complete the projects over with her.
The technique page was fairly simple. I just had to use my Scor-Pal to score a grid on the 6x6 background piece, a border design on the 1.5x6 band, punch out the labels, attach the ribbon to the band and assemble. I sponged some Dusty Durango and Soft Suade onto the background piece, dusted the edges of everything with the same two colors but that grid was just begging for a little something extra so I used some small motifs from 2 Papertrey Ink sets and stamped them in Dusty Durango, Soft Suade and Creamy Caramel. NOW it was ready for assembly.
For the card, I scored the grid onto the Creamy Caramel and then dusted with Vintage Photo Distress Ink, wrapped the ribbon around it and then mounted it to the card front. The sentiment was stamped onto Very Vanilla with Chocolate Chip then punched out with the large oval punch and attached to Pumpkin Pie and Dusty Durango ovals cut with the same punch. All ovals were dusted with Vintage Photo, a crystal brad attached just below the sentiment and then the unit was mounted to the upper left corner of the card.
The pumpkin vignette was stamped on Very Vanilla with Stazon Black then watercolored with a blender pen and SU markers. It was then cut out, mounted to Dusty Durango, cut out again slightly larger, dusted with Vintage Photo then mounted to the lower right of the card. The final touch was a ribbon knot attached just to the left og the vignette. There was also a Christmas card but I spilled something on it so...

Til next time...

Stamps: Papertrey Ink- Simply Stationery, Background Basics Stars; SU Holiday Best, Gifts of the Earth.
Ink: SU Dusty Durango, Soft Suade, Creamy Caramel, Chocolate Chip; Stazon Black; Vintage Photo Distress Ink.
Paper: SU Very Vanilla, Creamy Caramel, Pumpkin Pie, Dusty Durango.
Other: Scor-Pal; SU Large Oval, Modern Label Punches, Dusty Durango Ribbon, Blender Pen, Markers and sponge.

Wednesday, November 4, 2009

Emboss Resist Swap

I just love this technique and I love these colors. I recently bought SU's Razzle Dazzle after it finally dawned on me that it coordinates so well with all the "Bella" sets and it insisted that I ink it up. I used White Craft ink and Sparkle embossing powder on Very Vanilla then cut it out with a Spellbinders circle die. The border piece, which was done with Bella's Border Wheel used the same ink and embossing powder and was very easy to center since all my wheels are unmounted. I sponged a combination of Pale Plum, Perfect Plum and Bashful Blue on both pieces then cleaned off any excess ink with a paper towel. The Very Vanilla card was embossed with SU's Flourish Embossing Plate. The Rich Razzleberry pieces were cut out then embossed with the Cuttlebug Textile Texture embossing folder. For the Card Club Swap I stamped "For You" in Rich Razzleberry on Bashful Blue, cut out with an oval punch then mounted to a slightly large Very Vanilla oval. The day after Club, my Fancy Tags die set arrived. Isn't that always the way? I just had to see how it would look so I stamped my sentiment in Rich Razzleberry on Bashful Blue, die cut and embossed it then, while it was still in the die, I used a sponge dauber with Rich Razzleberry to lightly dust the center oval and darkly ink the designs on the sides of the tag. I just mounted it over the excisting ovals which gives it a dimentional look.

Til next time...

Stamps: SU Razzle Dazzle, Bella's Bloom, Bella's Border Wheel, Great Friend
Ink: SU Craft White, Rich Razzleberry, Perfect Plum, Pale Plum, Bashful Blue
Paper: SU Very Vanilla, Rich Razzleberry, Bashful Blue
Other: SU Photo Corners & oval punches; Spellbinders plain circles, Labels 3, Fancy Tags; Cuttlebug Textile Texture embossing folder; SU Flourish Embossing Plate; Hero Arts Sparkle embossing powder; sponge daubers & papertowels.

Tuesday, November 3, 2009

Just not my color combination

It's official! Black and White is not a color combination that works for me. Perhaps it's because I just don't consider black or white to be colors. I don't know but I just don't work well with them so this may be my final attempt. I believe this was a Verve Challenge from back in September and the only thing I like about it is the Stamp set and the glittery embossing powder I used. Oh and my bows came out pretty darn good too. LOL

Til next time...


Stamps: Verve - Starstruck; SU Polka Dot Background
Ink: Versamark, Versamark Dazzle Frost, Memento Tuxedo Black
Cardstock: SU Black, Neenah White
Other: Spellbinders Octagon Dies; Cuttlebug Embossing folders; Embossing Powders and Ribbons from my stash- origin unknown

Monday, November 2, 2009

Working on Website

Sorry, no card post today although I did do the photography for several projects I will be posting this week. Today I started on a website so I can upload photos of my craft room and other stuff. It's a very rough draft so far but it is up and running so pop on over to Paper Musings, the Website and take a gander at my craft room.