Pages

Monday, October 13, 2014

Gel Plate Monoprinting

Ran across a video here on how to make a permanent gel plate for monoprinting and decided to give it a whirl. It wasn't all that cheap to make, smelled a bit funky, foamed like a son of a gun and had to be skimmed repeatedly to get rid of all the foam but it did work.  I still have it in a container at room temperature and it hasn't grown anything but it is a pain to clean and I think a silicone glue gun mat will work just as well.

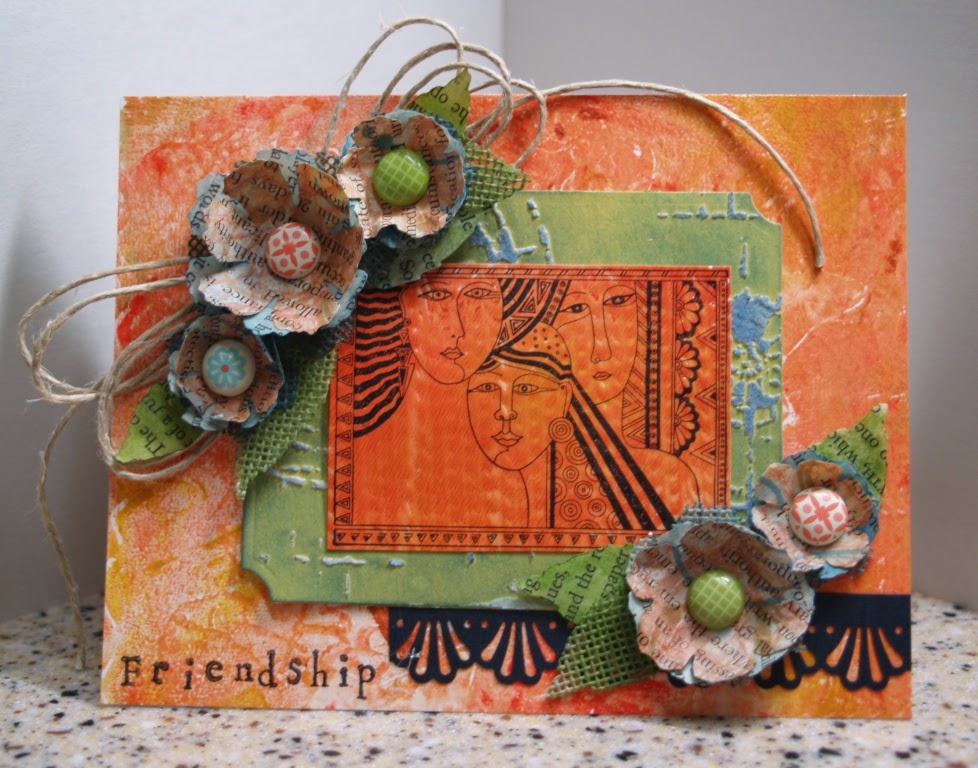
So there I was with several sheets of cardstock printed in some not so great colors but went ahead and used them anyway. I had a print that was made by brayering red, orange and ochre paint on the plate and then stamping into the paint with a damp marble design stamp. I cut it down and made a 4 1/4 by 5 1/2 inch card with it.

The second print started out yellow and blue but I overworked it and ended up with green. A little embossing paste, a stencil from The Crafters Workshop and Salty Ocean Distress ink on a 3 1/4 by 4 1/2 inch ticket die cut made it work.

The next print was red and orange paint that was combed with a rubber thingy for doing wood graining. I used black Archival Ink and a stamp I lovingly refer to as "The 3 Broads" from my ancient stash. No idea who made the stamp. It's really old and just bare rubber.

Flowers were die cut from the Tim Holtz Tattered Floral Garland decorative strip. Papers used were: a book page randomly stamped with Ripe Persimmon Distress Ink; book page sponged with Salty Ocean and ironed with paraffin wax; book page sponged with Peeled Paint Distress Ink; a piece of needlepoint canvas sponged with Peeled Paint Distress Ink and a second piece sponged with Salty Ocean.

A strip of black cardstock punched with a Martha Stewart border punch, decorative brads from StampinUp and a bow made from hemp cord complete the embellishments. The final touch was the word "Friendship" stamped in black Archival ink with alphabet stamps from Hero Arts.

Til next time...

Saturday, October 4, 2014

Testing 1 2 3 ...

I have been wanting to try recording some How-To videos for some time now but didn't know where to start. After watching this video from Imperfect Impulses and this one from Sheepishly Sharing I discovered that I had all I needed except experience so thank you Aaron and Margaret. I have already learned a lot just with this one test video - my resolution is too low, picture is out of focus most likely due to having the camera too high overhead, it's probably better to just do my project and narrate the process later and I need to stop waving my hands around since I'm Polish not Italian. (grin)

So anyway, here is my test run. Try not to laugh too hard and any and all advise will be greatly appreciated. My camera is a Sony DCR-DVD205 mounted to my old but trusty Velbon tripod and I'm using Roxio Creator 2011 as my video editor.


Til next time...

Wednesday, July 30, 2014

Fun with Art Journaling

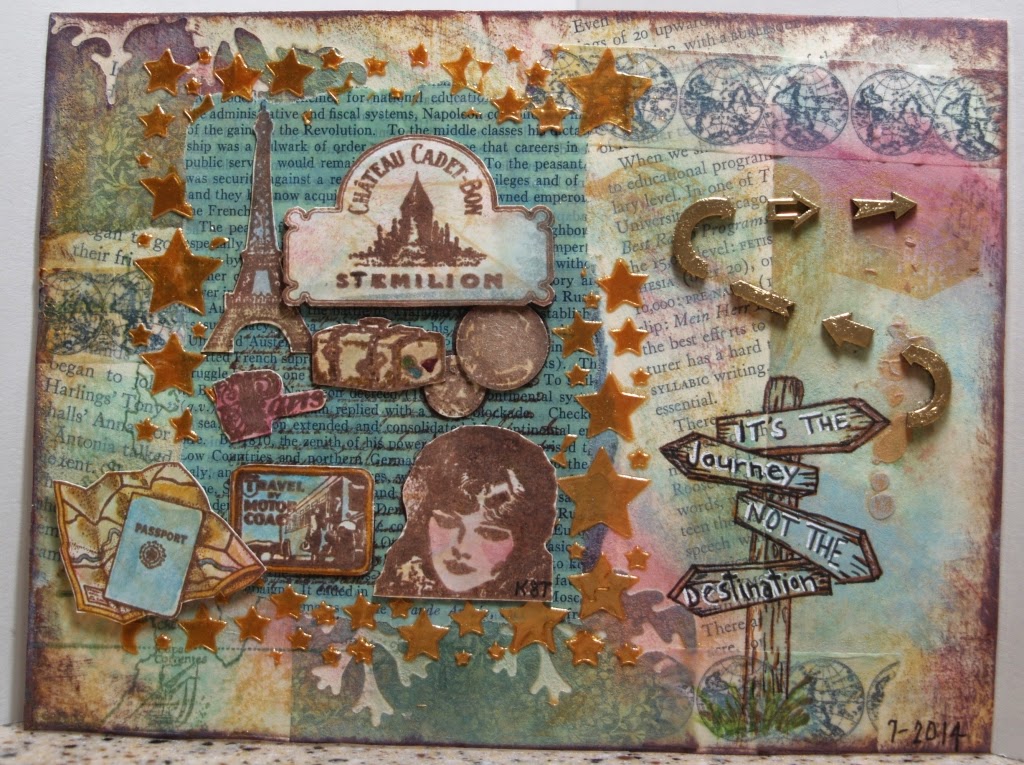
In Week 3 of Camp Scrap's Art Journaling we were to have fun and do what makes us happy. One of the suggestions was to use scraps and stamps left on the work table from a previous project. On my work table at the time was my order from UmWow Studios, patterned paper scraps from Week 1 Kit-tastic, book pages, pieces of faux resin paper, a strip of watercolor paper spattered and smeared with Distress ink and a roll of Washi tape with world globes on it. A quick search through my stamp collection turned up a travel set and a passport stamp.

I began by gluing down all the assorted paper scraps with matte medium followed by a few pieces of Washi tape and a very thin wash of gesso. I added swipes of random colors of Fresco Chalk finish dye ink from Stampa Rosa that haven't seen the light of day for years. I had forgotten how great this ink was. I then glued down a piece of faux resin paper and stamped it with the collage image from the travel set. Unfortunately the image just disappeared into the background. I added the stars with a stencil from UmWow and Wendy Vecchi Gold Embossing Paste and while that was drying I inked up a manila tag with the chalk ink, stamped the collage image and the passport then fussy cut all the pieces. The collage pieces were glued over the stamped image with some being up on foam tape and the passport was added to the corner with foam tape. The sign post was done with a black PITT pen, brown Copic and a white gel pen. The final touch was the Arrow Confetti from UmWow which was inked with Versamark, dipped in gold embossing powder and heatset before being glued in place. Once it was done the cut out images on the left looked pretty bland so I added color with Distress markers and a waterbrush.

Til next time...


Saturday, July 26, 2014

Sea Frame Week 2 Mixed Media

Sorry about the gap between posts but life got in the way with trips to doctor, dentist, veterinarian etc. Being a full time caregiver can be such a pain sometimes. I've had this project finished for a while but just couldn't seem to find the time to photograph it.

The mixed media project for week 2 of Camp Scrap was an embellished picture frame. I picked up a plain wood frame for $1 at Walmart and gathered some buttons, beads and other miscellaneous doodads from my collection. I coated the entire frame with Crackle Paste and embedded my largest items into the paste, filled in with small stones for fish tanks then set it aside to dry completely. The next step was to fill in any remaining space with a mixture of glass beads in 3 different sizes and matte medium and set aside to dry.

I painted the entire frame with Tim Holtz Distress Paint in Salty Ocean with streaks and dabs of Broken China and Victorian Velvet. Gave it a quick dry with my heat tool then applied Distress Stain in Vintage Photo, making sure to get it in all the cracks and crevasses then wiping it off all the raised areas. Final touch was dry brushing some Distress Stain in Tarnished Brass over everything. I am really happy with how this turned out.

Til next time...

Friday, July 18, 2014

WOYWW but it's Friday

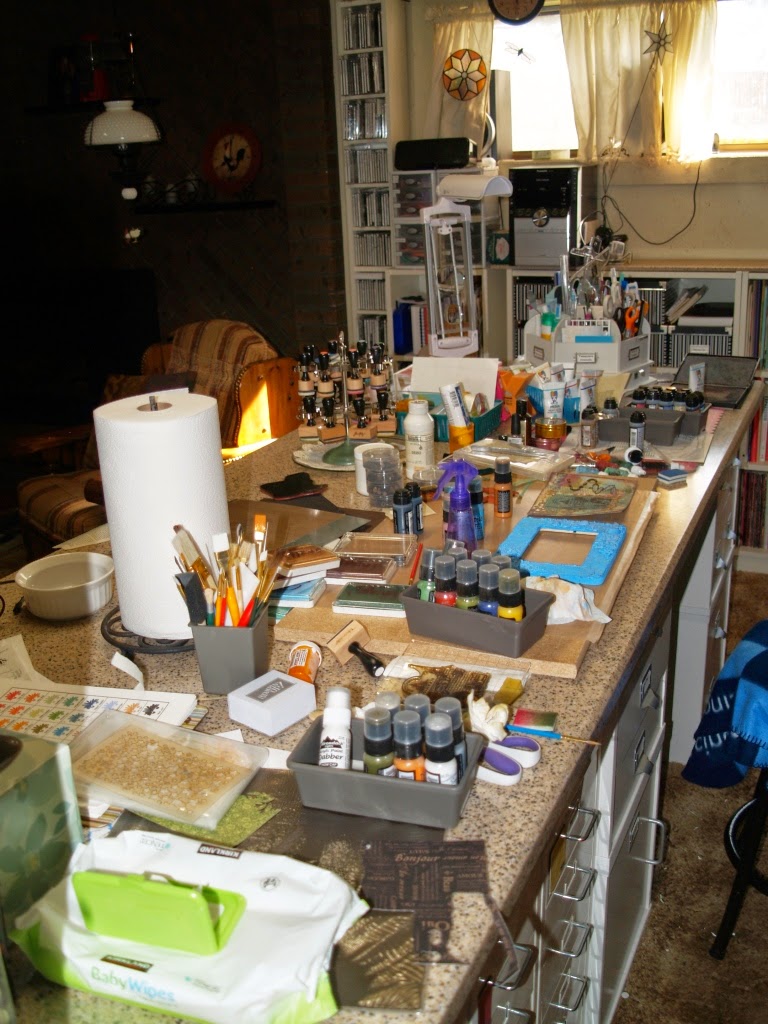
I am a true, dyed in the wool Virgo. I have a place for everything and everything is in its place. I mean, come on, all my Tim Holtz Distress inkpads, markers, paints and stains are in alphabetical order as well as all my rubber stamps. Crazy, I know, but I can put my hands on just about anything I need or want within seconds. That's why I just had to photograph my workbench today and share it with you. It is a complete and utter mess. Soooooo not like me but I had a blast working on last weeks Mixed Media project and this weeks Art Journal page for Camp Scrap.

Now I need to clean this disaster up so I can put the finishing touches on my projects and get them posted.

Til next time...

Wednesday, July 16, 2014

Week 2 Art Journal

Yes I know I'm running behind. I wish I knew how other people can cook, clean, do laundry, medicate a sick dog, care for an old man, feed and water dogs, cats & chickens, make jam, create artwork, photograph it and get it blogged without getting behind. I haven't even looked at this weeks projects. Oh well, fortunately Camp Scrap is all recorded and should keep me busy for months.

Anywhoway... Last weeks Art Journal Project was to a) Use just one color b) Be inspired by a single shape and c) Use something from around the house. I did 2 of the 3. I couldn't think of a single thing around the house that I could use.

I chose hexagons because they remind me of chicken wire (I'm obviously obsessed with all things Chicken) and bees. The shades of yellow just seemed to go with the honey bee theme so I went with it.

In order of execution:
  1. Apply book page to mixed media paper with matte medium
  2. Gesso the whole page
  3. Randomly stamp hexagon outlines (Papertrey Ink & StampinUp)
  4. Mask previously stamped hexagons
  5. Randomly stamp patterned hexagons all over page and emboss with clear embossing paper. (Papertrey Ink and StampinUp)
  6. Airbrush with Copic markers starting with lightest shade of yellow in upper right corner, working down towards lower left corner using medium shade and ending with darkest shade.
  7. Use Tim Holtz Honeycomb stencil and alcohol dampened applicator to remove some ink here and there.
  8. Use alcohol and cotton swabs to remove excess ink from embossed hexagons
  9. Remove masks, journal in and around white hexagons and stamp a few bees (PITT pen, StampinUp bees)
  10. Using UmWow's hexagon confetti mask, apply a mix of white and gold embossing paste here and there (Dreamweaver, Wendy Vecchi)
  11. Stamp, die cut, color and embellish large bee and mount in lower corner. (StampinUp bee and die, Copic Markers, Glossy Accents, Donna Salazar Pralines & Cream glitter

P.S. If you read my last post, the UmWow mask did give me a sharper, higher profile with the embossing paste that I really like on this piece.

Til next time...