Pages

Showing posts with label Spellbinders. Show all posts

Saturday, July 12, 2014

Kit-Tastic Week 1

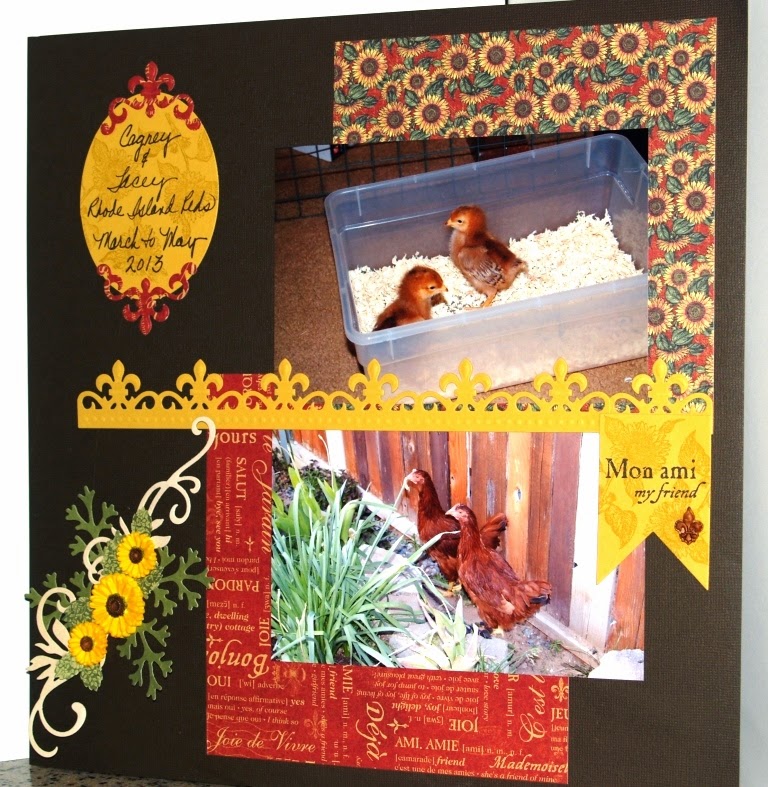
In the Kit-Tastic category for Camp Scrap we will be working with kits obviously.  If you don't have any kits you can create your own using supplies you already have following a basic guideline. This first weeks session used 6x6 patterned papers, 3 neutral 8.5X11 sheets of cardstock and 2 colors of 8.5 x 11sheets of cardstock that coordinate with the 6x6 paper. Add some embellishments and 2 sheets of 12x12 cardstock to build your layout on and you were good to go. Have I mentioned that I have an entire drawer full of 6x6 paper pads, mostly untouched?

To create my kit I chose Graphic 45's French Country pad along with the coordinating stamps, StampinUp's cardstock in Cherry Cobbler, Hello Honey, Early Espresso, Very Vanilla and Crumb Cake. I created my own embellishments with silicone molds from Mod Podge and StampinUp's Simply Pressed Clay along with Copics and some Spellbinders dies. Added I piece of burlap from my stash.

I am very pleased with the 2 layouts and I'm thrilled to finally have the 2 youngest of my flock recorded for posterity.


Til next time...

Thursday, February 27, 2014

Share Your Project

Guess who is back and ready to blog again?  To get back into the swing of things I am showing a project I made for a challenge sponsored by Scrapbookpal.com to use Spellbinders dies. I used Labels 4, Labels 4 Small, Gold Labels and Labels 17.


Other supplies used in this project are:
Paper, Ink, Butterfly Punch and stamp - StampinUp
All other stamps and dies - PapertreyInk
 
 
Til next time...

Sunday, September 9, 2012

Getting a Little Mojo Back

Well I certainly didn't mean to be gone so long but the antibiotics they gave me in December for strep throat only killed the sore throat and not the strep. By mid-May I was down for the count with Rheumatic Fever. So far it doesn't look like there is heart damage, the kidneys are recovering and the joint pains seem to be back down to pre-strep levels so it's painful but managable. I'm just now getting some energy back and decided to give Verve's September 3rd Mojo Monday a shot. It only took me 6 days! LOL


Stamps: Verve
Cardstock: DCWV
Paper: Memory Box
Dies: Verve, Spellbinders
Other: Ranger Stickles, StampinUp ink and embossing folder

Til next time...

Tuesday, April 17, 2012

New Beginnings

[Blog-Party-Logo%252070%2525%255B4%255D.jpg]
That's the theme for todays Waltzingmouse Blog Hop but it applies to my life and this blog as well. I can't believe it has been nearly 5 months since my last post. Life has been a rollercoast, full of ups and downs and will take a few posts to get everyone up to speed.

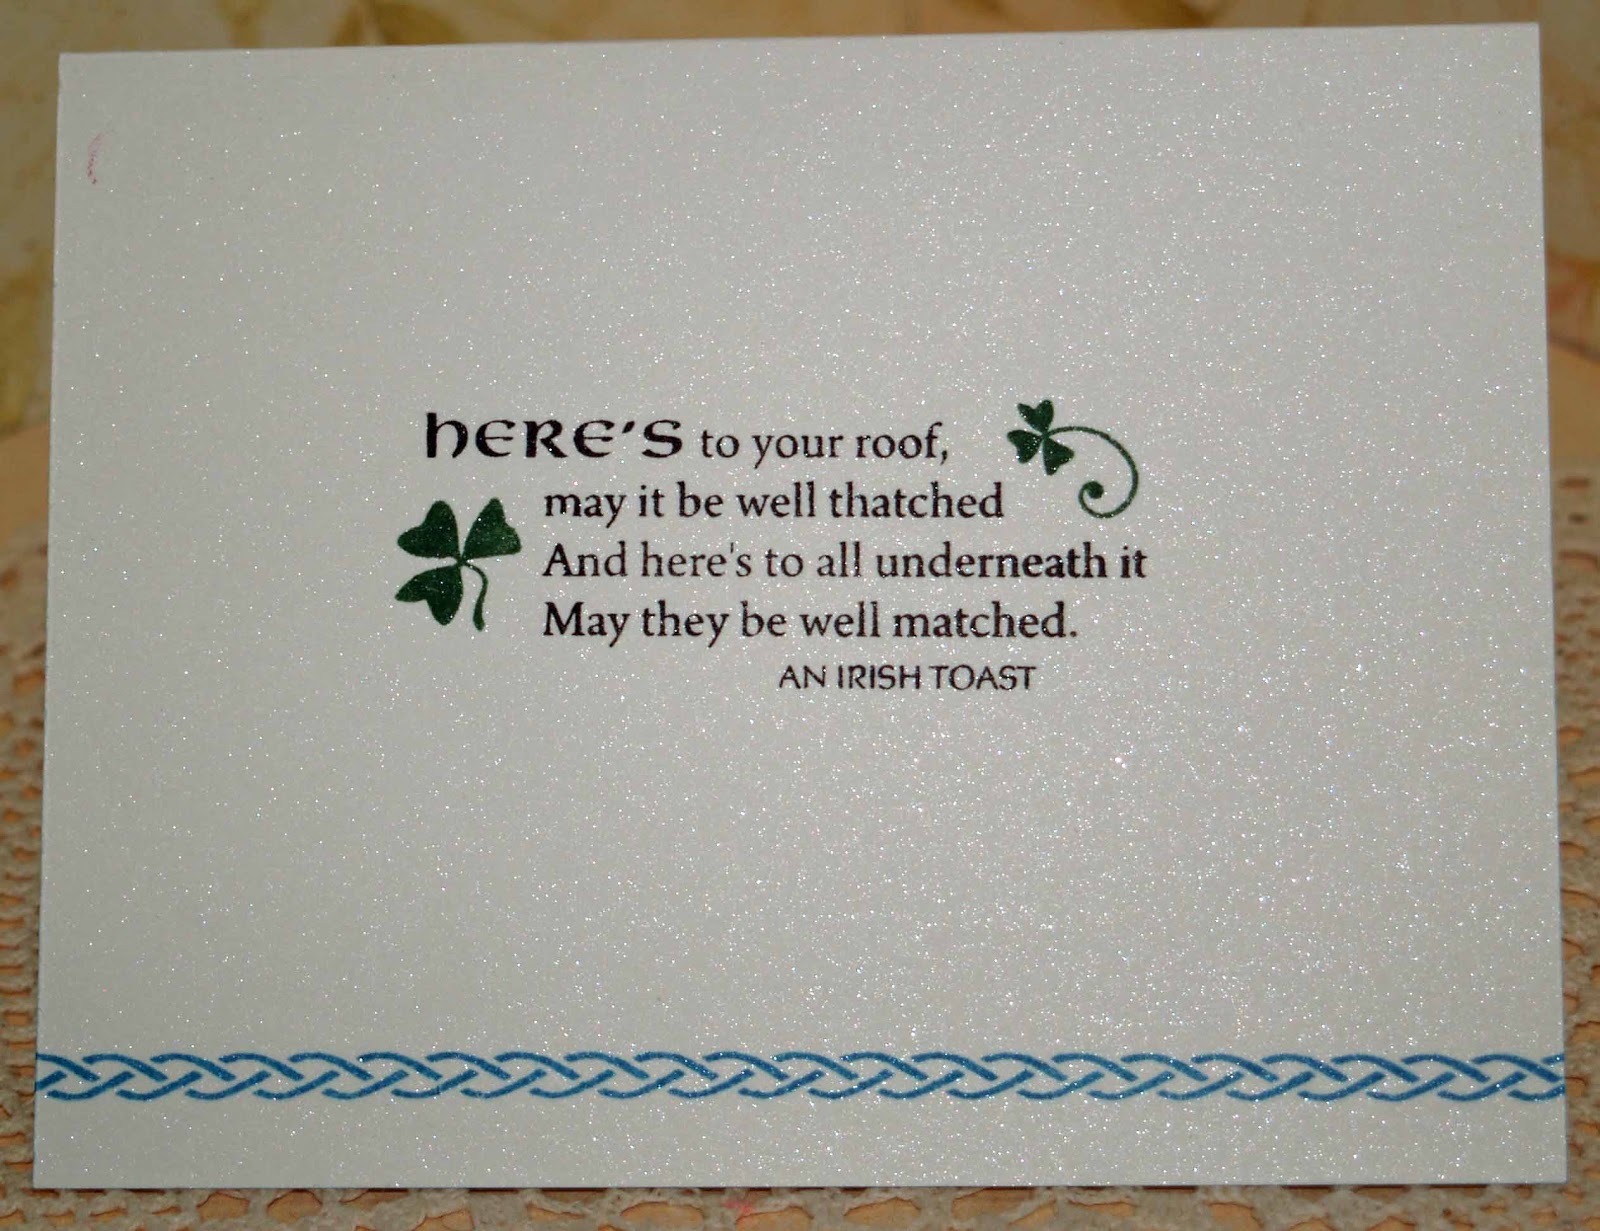
The card I am showing today was made for one of the recent "ups" - my son and daughter-in-law's new home. They are just over the moon and we are all so thrilled for them.  I started with an old Stampendous cottage image, colored it with Copics then built the card around it. Not my usual method but it worked.

Stamps: WaltzingMouse - Cottage Home, Heirloom Patterns, Irish Blessings; Stampendous Cottage
Embossing Folders: StampinUp
Dies: Spellbinders, StampinUp
Cardstock: StampinUp
Other: Copic Markers & Air Brush System, Flowers handmade by me, Quickutz leaves, Martha Stewart fern

Til next time...

Wednesday, November 16, 2011

1st Christmas Card of 2011

In the weeks since I last shared a project I have been busy trying to learn some new software and to become more proficient with many of the programs I already have. I've also designed far more Christmas cards than I will need but the ideas just kept coming. Well they were until this miserable sinus thingy turned my head to mush. Sunday I felt well enough to line up all the cards I made and at least get them photographed. Planned on getting a post up on Monday but oldest son came over to spend some time with me so the blog got pushed to the end of the line again. Now, finally, here is the first of this year's Christmas collection...


If something looks familiar it's because I used the same Verve sketch as I did in this post .  I really like the look of this sketch and I imagine I'll be using it again in the future.

Stamps:  Papertrey Ink, StampinUp

Cardstock: SU River Rock, Bravo Burgundy

Ink:  SU Handsome Hunter

Other:  Aleene's Paper Glaze, SU Grosgrain ribbon, Spellbinders tag die

Til next time...

Wednesday, September 21, 2011

Fall Fun

Fall is in the air. The leaves around here haven't started changing but the temperatures sure are getting pleasant. For the September VLV 3rd Week's sketch challenge I decided to go with a fall theme. I originally planned to use some Basicgrey DSP but once it was cut I just didn't like it so I had to go back to the drawing board. Ended up stamping my own paper but had fun doing it and it matched the ribbon I found in my stash. All in all it's not half bad even though it is so far removed from my original vision.

  Stamps: Verve - Autumn Splendor, Bountiful Harvest, Happy Fall, Sweet Treat, Ecclesiastes 3:11

Paper: SU - Very Vanilla, Chocolate Chip, Peach Parfait, Cajun Craze, Rich Razzleberry, Lucky Limeade

Ink: Chocolate Chip, Peach Parfait, Cajun Craze, Rich Razzleberry, Lucky Limeade

Dies: Verve - Sweet scallop Tag, Embossed Oval; Spellbinders - Circles, plain & large scallops

Other: Tim Holtz Embossing Folder, ribbon from stash

Til next time...

Friday, September 16, 2011

Monochrome Madness

Verve's Get Your Diva On challenge for September was to create a monochromatic card. I told Sankari that her challenge had me both stumped and intimidated at first. How do you even decide what color to go with? But then the light came on and I was off and running.

My first card (A) went together, zip, zap, zip once I had the color scheme figured out. I had been dying to use those loopy flowers from Verve's Making a Statement set as well as the leafy sprigs from Sunny Days and I love to antique things. Give me some Distress ink, a non-stick mat and one of Tim Holtz's blending tools and I could blend away for hours. I was quite pleased with the way it turned out but then it hit me - Why don't I try and take it up a notch or 2?


For the second card (B) I used the same color scheme (don't know why they came out different in the photos) and layout but used a different DSP, made lace flowers, sprayed some parts with Perfect Pearls Mist and added a lot more pearls. I honestly don't know which card I like better but I think I'll be doing more monochromatic cards in the future.

Stamps: Verve- Wishful Elegance, Sunny Days, Making a Statement (A); SU - Teahouse

Paper: SU - Crumb Cake, Very Vanilla (A), Bella Bleu DSP; Curious Iridescent Poison Ivory (B)

Ink: SU - Crumb Cake, Soft Suede; Ranger - Frayed Burlap Distress

Dies: Verve - Leafy Sprigs, Loopy Blooms; Spellbinders Ovals - Plain & beaded

Other: Michaels - Pearls; SU - lace; Ranger - Perfect Pearls Mist

Til next time...

Tuesday, September 13, 2011

Another Great Sketch from Verve!

Week 2's sketch for September's VLV Sketch Challenge is another good one. Like Week 1, this card just fell into place exactly the way I wanted. Hmmm... 2 weeks in a row... maybe I should worry. Normally, when I do a challenge, I try to use only stamps from the company hosting the challenge. This time, instead of limiting myself, I just grabbed whatever stamps I needed to get the effect I wanted regardless of which company made the stamp. Creating without limits is so much more fun!

Stamps: Verve - Hope Perches, Tag Time; SU - Silhouette Sentiments Hostess Set; PTI - Background Basics Newsprint.

Paper: Prima - Romantique; SU - Cajun Craze, So Saffron, Old Olive;

Ink: Ranger - Distress Old Paper; SU - Cajun Craze, Old Olive

Dies: Verve - Tiny Sweet Scallop; Spellbinders - flower, circles

Other: Martha Stewart Picket Fence punch; Twine from The Twinery; Antique Copper Brad from Making Memories.

Til next time...

Thursday, September 8, 2011

Kooky Kolors for a Baby

Not that I'm a little behind or anything, but this card was made for Waltzingmouse Sketch #61 found here. It's a bit of a mish mash of techniques including making my own custom ribbon with Copic Markers (a Make It Monday challenge), making a custom brad with stamps and Glossy Accents, and doing a Tim Holtz Distress ink thing. I don't know why I chose this color combo other than it appealed to me. I created the paper that the birds and brad piece were stamped on using the Wrinkle Free Distress technique with a bit of a twist but I may have used a bit too much water.

Over all I am rather please with this project even if it is a bit weird for a baby card.

Stamps: Waltzingmouse - Celtic Heritage, Faux Fun, Fauz Fun Circles, Fancy Flourishes, Vintage Circles

Ink: Distress - Tumbled Glass, Broken China, Black Soot; StampinUp - Tempting Turquoise, Basic Gray

Paper: StampinUp - Whisper White, Tempting Turquoise, Basic Gray, Basic Black

Other: Cuttlebug Embossing Folder, Spellbinders Circle Dies, Copic Markers, Grosgrain Ribbon from Michael's, Glossy Accents from Ranger


Til next time...

Friday, August 19, 2011

Waltzingmouse Sketch #60

I had so many ideas running through my head for this weeks Waltzingmouse challenge but this is something I have wanted to try for a while.  It is a bit of a stretch but it fits. Hope you like it.
Hatbox Closed
Stamps: Waltzingmouse - Asian Gardens Additions, Eat Cake, Very Vintage Christmas, Very Vintage Labels #5, Fancy Phrases

Cardstock: StampinUp - Rose Red, Pink Pirouette, Whisper White

Ink: StampinUp - Rose Red, Basic Gray, Pink Pirouette

Misc: Spellbinders Die - Labels #5, Organdy Ribbon & Ribbon Roses from stash


Til next time...

Thursday, August 11, 2011

Yaba Daba Do, It's VLV Week #2

I am a paper hoarder.  I buy all kinds of designer papers with the intent to make all kinds of gorgeous cards and scrapbook pages but then I put them away and never use them. Why?  Because if I use them I won't have them anymore. I do the same with ribbon, brads, pearls etc. so I end up just using ink, stamps, cardstock and die cuts. I guess I need some kind of 12 Step Program. 

Any who way...

I was so inspired by all the phenomenal work done by the Verve Divas this week I just had to step out of my little box. Stand back everyone. THIS is a biggie! For Verve's Viva La Verve Sketch Challenge for Week 2 of August, I broke down and used a whole 4 1/4 X 5 1/2 inch piece of some hoarded My Mind's Eye paper from 2006.  And I used a piece of my cherished Blush Blossom cardstock that StampinUp retired along with 2 treasured pearls from Michael's. I told you it was a biggie! So here is my "Diva Wanna Be" creation:


Stamps: Verve - Bloom & Grow, Sweet Treats, Grateful Elegance, Celebrating You
Dies: Verve - Classy Label, Embossed Oval, Floral Circles, Elegant Leaves; Spellbinders - Large Ovals, Small Ovals.
Ink: StampinUp - Always Artichoke, Blush Blossom
Cardstock: StampinUp- Always Artichoke, Blush Blossom, River Rock
Misc: Martha Stewart Iron Fence Border & Corner Punches, Micheal's Pearls, My Minds Eye DSP.

Til next time...

Wednesday, August 10, 2011

Viva La Verve August Week 1

I decided to give Verve's VLV Sketches for August a whirl and tackled Week 1's sketch yesturday.  I'm not sure what direction I was going or hoped to go but looking at the mess I'd say I had a darn good time getting there.

My list of supplies for this 5 x 5 card is rather large. Am I trying to become a Diva or something? Check it out!
Stamps: All Verve - Accent Notes, Celebrating You, Hearts Desire, Love's Flower and Bloom & Grow as well as the Floral Circles and Elegant Leaves Dies.
Inks: StampinUp - Riding Hood Red, Early Espresso, Pool Party; Ranger - Walnut Stain Distress; Tsukineko - Memento Tuxedo Black
Cardstock: StampinUp - Whisper White, Blushing Bride, Riding Hood Red, Early Espresso, Pool Party
Misc: Spellbinders Circle Die, EKSuccess Medallion Chain Punch, Cuttlebug Embossing Folder, Michael's Brads and Ribbon
Now to tackle Week 2's sketch!

Til next time...

Tuesday, August 2, 2011

WaltzingMouse Sketch 58

Have I mentioned how much I love making my own backgrounds?  For this weeks WM Sketch Challenge I made a background using Dainty Doilies and Cameo Maker that is just perfect for a baby card. And just in time too because my friend Jamie is having her baby girl today.

All stamps are from WaltzingMouse; Ink & cardstock is StampinUp; Offray Ribbon; Cuttlebug Embossing Folders; K&Company brads; Spellbinders dies.


Til next time...


Saturday, July 30, 2011

Metallic Ink Resist

I happened to pop in on my friendly StampinUp Demo just as she was checking out the Workshop Wow DVD she picked up at the convention last week and got to see this technique demonstrated by Heather Summers. I was intrigued and just had to try it myself.

You pour a small amount of the metallic All Purpose Ink onto a paper plate then dab it onto your cardstock using a scrunched up piece of plastic wrap, leaving plenty of white space.


Allow the ink to dry, then sponge on dye ink over the metallic ink.  Wipe excess dye ink off of the metallic with a tissue.

Once that is dry, you stamp over it with a solid stamp.  I used Archival Ink so you can see traces of the metallic through it.  I plan on trying it with StazOn to see if that will make a smoother, more opaque impression.

To finish the card I made a smaller piece of the resist for the sentiment panel.

You can try this technique with a detail line stamp and used sponges to color the image in.

Sources: Tsukineko All-Purpose Ink (Frost White); StampinUp Cardstock, Dye Ink & rubber stamps; Ranger's Archival Ink; Spellbinders dies; pearls from Michael's

Til next time...

Tuesday, July 19, 2011

Dry Brushing Make It Monday

Why is it that when the word Challenge is mentioned, things become harder than they really are? Or am I the only one who goes spastic over card challenges? Dry brushing (MIM technique found here)  is a very simple yet effective technique that should have taken me no time at all to do and here it is late Tuesday afternoon and I am just finishing up. Sheesh! My color scheme started out as Bravo Burgundy, More Mustard, Night of Navy and Very Vanilla but it ended up as Wild Wasabi, Rich Razzleberry, Pool Party, Island Indigo and Whisper White. I dry brushed white paint on the Indigo layer and then dry brushed the Pool Party layer with the matching Pool Party ink. I'm not sure if I like the paint but I think dry brushing with ink is a great alternative to sponging.


Cardstock, ribbon and ink from StampinUp
White paint from Making Memories
Snowcap White ink from Ranger
Stamps, basket and napkin die and Impression Plate from Papertrey Ink
Other dies from Spellbinders
White Lace and brad from stash


Til next time...


Wednesday, July 13, 2011

What the Cluck!

I just had to show this card I made for a friend's 50th Birthday. He was so impressed with my chickens that this spring, he got 3 of his own, hense the chicken card.
The chick and party hat are from a Crafty Secrets set called Farm Chicks , Candles with stars are from a See D's Birthday set I picked up used, Gingham background stamp is from Waltzingmouse, sentiment was made with a JustRite alphabet and the cardstock is StampinUp's Real Red, Baja Breeze and Whisper White. Ink used was SU's Real Red, Memento Tuxedo Black, Antique Linen Distress Ink and Copic Markers.

Til next time...

Wednesday, July 6, 2011

Back & Up for a Challenge

I can't believe it's been over 3 months since I have posted anything.  I know I've been very busy but just not sure with what. I've made a ton of great projects but forgot to photograph any of them before sending them off to their recipients. Hopefully I can get back in the swing of things starting with this sketch challenge from Waltzingmouse.


The colors used were Real Red, Peach Parfait, So Saffron and Certainly Celery in inks and cardstock from StampinUp. Rubberstamps are from Waltzingmouse, Dies from Spellbinders, border punch from EKSuccess and ribbon from my stash. Flowers were colored with Copics in the colors shown.

Tomorrow I will be posting my card for PTI's Make It Monday Challenge.


Til next time...

Wednesday, March 23, 2011

Prismacolor to Copic

I love my Prismacolor Markers.  They’re fat, easy to hold, relatively inexpensive, American made, easy to blend and shade and come in plenty of colors.  I saw no need to jump on the Copic bandwagon. Unfortunately I have been having a hard time removing the caps on my Prismacolors.  I can use my pinky and ring finger around the cap and yank with the other hand but then I get ink all over the side of my hand and this technique only works on good days anyway.  I tested some Copic Sketch Markers at a local store and found them much easier to open and not only are they comfortable in my hand, the oval shape prevents them from rolling away. So needless to say, I took the plunge… big time!

 I got my first batch of markers at Christmas plus the Air Brush Kit.  Never got to use them with all the remodeling but picked up an air compressor at Harbor Freight.  Then I got a deal at DickBlick.com – one of those “Spend X amount to get 15% plus free shipping” – so I ordered more markers plus a set of Spica pens.  Still didn’t use them but they were there just waiting for when I found the time.  Well, last week, Dick Blick had another deal – spend $179 and get 20% off plus free shipping – soooo, I ordered more markers plus the second set of Spica pens. I must need my head examined. So here I am with 117 markers, 24 Spica Glitter pens, an air brush system and an air compressor.  It is definitely time to get busy and use this stuff.

I used Viva La Verve’s Sketch Challenge for March/Week 2 and stamps from Verve’s Easter Joy set along with die cuts from Spellbinder’s Eyelets Pendant and Border sets and circle dies. Ink, cardstock and ribbon is from StampinUp.
 
 I stamped the flower with Memento Tuxedo Black on 2 white circles.  The one on the left I colored with Prismacolor Markers 147 Greyed Lavender, 129 Dahlia and 168 Dark Purple.  The one on the right I colored with Copic  V0000, V01 and V12.  Blending and shading with Prismacolors is very easy so blending and shading with the Copics takes a bit of getting used to.  Copics aren’t necessarily harder to work with, just different.

 Airbrushing with Prismacolor markers is not possible so this was a whole new experience for me. I cut the flower from the Prismacolor circle to use as a mask, put the Copic circle back into the die, applied the mask and airbrushed with Copic Y00 then removed the mask and die.  I was in awe.  I cut a label and label mat with “the cutter that shall not be named”, stamped the sentiment on the white label with Su’s Rich Razzleberry, colored it with Copics then airbrushed with the Y00.  I am hooked! 

To finish the rest of the card I embossed the card front with SU’s polka dot embossing folder with my Big Shot, threaded SU’s Razzleberry Taffeta ribbon through the border die cut, added a bow and a few rhinestones from Imaginisce and there you have it.
If anyone is interested in trying alcohol markers and would like to buy my entire collection of Prismacolor markers at a very good price just email me.


Til next time…

Thursday, December 24, 2009

It's almost here!

It's 6 AM on Christmas Eve as I type
this. We are having our big family dinner and gift exchange today because our oldest son is a chef and will be working tomorrow. I can't wait to see my husband's expression when he discovers the big surprise I have for him. I am so excited! And NO, all you comedians out there, I am NOT pregnant!

Here are the last of this years cards. This first group features stamps from Waltzingmouse. Upper left: cardstock & ink from StampinUp; paper from Basic Gray; Cuttlebug dotted swiss and holly border embossing folders; icycle border punch from martha Stewart. I began the center piece by stamping the Waltzing mouse Labels4 stamp onto Craft-a-Board, stamping the sentiment inside, cutting and embossing with Spellbinders Labels Four die, dusting the edge with pale green ink then glue and finally adding the Twinklets Diamond Dust. The icicles were also coated in glue and Diamond Dust.
Center Right: Stamps from Waltzingmouse; paper by Basic Gray; Cardstock & ink by StampinUp; Spellbinders Star die; Craft-a-Board; Tsukineko Frost White All Purpose Ink; ribbon & button from stash.
Bottom Left: paper & lace from Webster's Pages; ribbon from Ellen Hutson; cardstock & ink by StampinUp; stamps by Waltzingmouse; Gold embossing powder from JudiKins; Prismacolor markers; Peeled Paint Distress Ink.

This final group were all inspired by Ellen Hutson and use paper and trims from Webster's Pages and cards with matching envelopes from Memory Box. Additional products used (clockwise from upper left): Angel Stamp unknown, sentiment from Papertrey Ink, ink from StampinUp; Joy to You stamp from Hero Arts, Bramble Wreath from Memory Box, ink & cardstock from StampinUp, Stickles Glitter Glue, Distress Ink, Spellbinders Labels Three; Peace from PSX, cardstock, ribbon & ink from StampinUp, border punch from Fiskars, Glitter by Stampendous, Spellbinders Labels Five die, Distress Ink; Doves stamp by PSX stamped with Memento Tuxedo Black and colored with Prismacolor markers and a white gel pen, Stickles Glitter Glue, Spellbinders Deckled Rectangles die. Both the Angel and Dove cards also have a border drawn with a Prismacolor Metallic Gold marker.

I hope to be able to post my 12 Days of Christmas Tags starting with Day One tomorrow but I'm not making any promises. The plan is to use my Slice and the Mistletoe Design Card as well as leftover papers and trims, various glitters and Tim Holtz finishes to commemorate each day from Christmas to Epiphany. Let's see if Life cooperates.

Wishing you all a very Merry, Peaceful and Blessed Christmas.
Til next time...

Wednesday, December 23, 2009

Laid Back Christmas

I've taken things very slow and easy this year. I saw no point in making my hands hurt worse than they do so I eliminated many things from the schedule and really enjoyed the things I did manage to do. One of the things I really enjoyed was making my Christmas cards. I only made 2 a day and didn't stress over them. They became the highlight of my Christmas preparations - that and online shopping.
In this first group, the upper left card was made with paper from American Crafts; cardstock, ribbon, ink and ornament stamps by StampinUp; Cuttlebug border embossing folder; Label 4 stamp and sentiment by Waltzingmouse Stamps; Spellbinder's Label 4 die; gold thread.
The bottom left card uses paper from Cosmo Cricket; cardstock, stamps, ink, paper punches and label die by StampinUp; Cuttlebug embossing folder; gold thread; All Purpose Ink in Champagne Mist by Tsukineko.
The final card in this group features a frame cut from Ellen Hutson's Craft-a-Board using a Spellbinder's die which was then sponged with Champagne Mist All Purpose Ink. The deer is a stamp from All Night Media that I have had for years. Other products used were: embossing folder, cardstock, ink, and sentiment from StampinUp; paper from Basic Gray; ribbon from stash.

In this second group, starting with the card on the left, I have a very quick and easy card made using paper and a matching brad from Bo Bunny Press. The cardstock, ribbon, ink, stamp, paper punch and border punch are from StampinUp and the larger scalloped circle punch is from EKSuccess.
The card on the upper right features scoring on the Scor-Pal and a buckle from a Spellbinder's die accented with a Stardust pen. Cardstock, red & green inks, stamps and ribbon are from StampinUp; Spellbinder's large and small oval dies; Antique Linen Distress Ink.
The final card in this trio uses the Dotted Swiss embossing folder from Cuttlebug; Labels Two dies from Spellbinders; Stickles Glitter Glue; Prismacolor Markers; trees from HeroArts; Memento Rich Cocoa Ink; Green Ink, sleigh, sentiment, holly border, oval punches and cardstock from StampinUp.

Til next time...