There is an art journaling blog and YouTube channel that I've been following called Imperfect Impulses with Aaron so I guess that makes me one of his Imps. I love this guy - his techniques, his style, his videos as well as his personality. And he likes Lady Gaga so all in all he is just about perfect. There is just one tiny, little problem. He has been costing me money. In a recent video Aaron used some masks and doodads from Um Wow Studios that I just had to have.
UmWow has all kinds of laser cut chipboard from the tiniest Confetti Collections up to tag books. I tried to restrain myself but the confetti packages were just so tempting. I ended up ordering 7 packages of confetti. They are supposed to be chipboard but look like wood. They can be stained, painted, stamped on, heat embossed and probably things I haven't thought of yet. I do have to warn you though - these are laser cut so there is soot on them. Don't drop them on anything light that you want kept clean and wipe your hands after handling.
Diamonds: Solids as small as 1/8 inch up to 5/8 and frames from 3/8 up to 1 inch.
Chevrons: Solids and frames from about 3/8 to 1 inch
Octagons: Solids and frames from less than 1/4 up to about an inch.
Snowflakes: 1/8 to 1 inch
Gear Mash: The smallest is about 3/8 and the 2 largest are 1 1/2 and 2 inches.
Arrows: Every type imaginable!
Love Confetti: Hearts, tags, lips, people, X&O, and arrows in assorted sizes.
UmWow's masks are a bit thicker than most of the other masks and stencils I have which should give me a higher profile when using embossing paste. They are also a bit stiffer so I am wondering if I will get a sharper image when sponging or spritzing. The five that I chose for my first haul are: Brick, Butterfly Swarm, Diamond Confetti, Hexagon Confetti, and Star Confetti. Can't wait to use these!
Plan on seeing these products from UmWow in future projects. I already have a partial order ready to go and I haven't even used this stuff yet. Is there a 12 Step Program for this?
Til next time...
Monday, July 14, 2014
Sunday, July 13, 2014
Fun with Mixed Media
The first project in Mixed Media for Camp Scrap was a 5x7 canvas. Can't remember ever working on a canvas so this was a new experience. I didn't have most of the supplies and stamps so I made do with what I had.
First step was to apply a book page with Acrylic Matte Medium which acted like both an adhesive and a sealer. Since I didn't have acrylic paint, I mixed Gelatos with the Matte Medium and painted over the whole canvas. Next I added a piece of burlap with the same medium and while that was drying I made the melon layer with more gelatos and matte medium, stamped a script background, embossed it with clear embossing powder to seal it then glued it over the burlap layer. For the bird and foliage I used the stamps from StampinUp's Friends 24-7, stamped with Versamark and then used black embossing powder. I colored them with Derwent Inktense Pencils, fussy cut them and set them aside.. If you've never tried the Inktense Pencils you are really missing out. They are the most fabulous watercolor pencils I have ever used and I have used them all.
Made a lace doily stencil with glossy cardstock and a Cheery Lynn die, placed it on the canvas and applied embossing paste. While the doily was held in place by the paste I lightly spritzed with Dylusions then removed the doily. While the doily was loaded with paste and colored spray, I placed it face down on a piece of mixed media paper, rubbed from the back then removed the doily. I now have a beautifully colored doily plus a doily print to use on other projects.
I ran into a bit of a problem stamping the sentiment from Verve Stamps on the upper right corner. May showed how to stamp on uneven surfaces by using just the stamp and not an acrylic block. It looked so easy until I tried to do it. Disaster! I ended up stamping on a piece of tissue, heat embossing in black and setting it in place with matte medium which makes the tissue disappear.
Final steps were to attached the foliage to the surface, the bird up on a bit of foam and some bits and bobs from my stash. I added just a hint of distressing with a stamp from Tim Holtz's Slight Alterations set and Wendy Vecchi Archival ink in Tree Branch. This was a really fun project and I plan on doing more of these little canvases.
Til next time...
First step was to apply a book page with Acrylic Matte Medium which acted like both an adhesive and a sealer. Since I didn't have acrylic paint, I mixed Gelatos with the Matte Medium and painted over the whole canvas. Next I added a piece of burlap with the same medium and while that was drying I made the melon layer with more gelatos and matte medium, stamped a script background, embossed it with clear embossing powder to seal it then glued it over the burlap layer. For the bird and foliage I used the stamps from StampinUp's Friends 24-7, stamped with Versamark and then used black embossing powder. I colored them with Derwent Inktense Pencils, fussy cut them and set them aside.. If you've never tried the Inktense Pencils you are really missing out. They are the most fabulous watercolor pencils I have ever used and I have used them all.
Made a lace doily stencil with glossy cardstock and a Cheery Lynn die, placed it on the canvas and applied embossing paste. While the doily was held in place by the paste I lightly spritzed with Dylusions then removed the doily. While the doily was loaded with paste and colored spray, I placed it face down on a piece of mixed media paper, rubbed from the back then removed the doily. I now have a beautifully colored doily plus a doily print to use on other projects.
I ran into a bit of a problem stamping the sentiment from Verve Stamps on the upper right corner. May showed how to stamp on uneven surfaces by using just the stamp and not an acrylic block. It looked so easy until I tried to do it. Disaster! I ended up stamping on a piece of tissue, heat embossing in black and setting it in place with matte medium which makes the tissue disappear.
Final steps were to attached the foliage to the surface, the bird up on a bit of foam and some bits and bobs from my stash. I added just a hint of distressing with a stamp from Tim Holtz's Slight Alterations set and Wendy Vecchi Archival ink in Tree Branch. This was a really fun project and I plan on doing more of these little canvases.
Til next time...
Saturday, July 12, 2014
Kit-Tastic Week 1
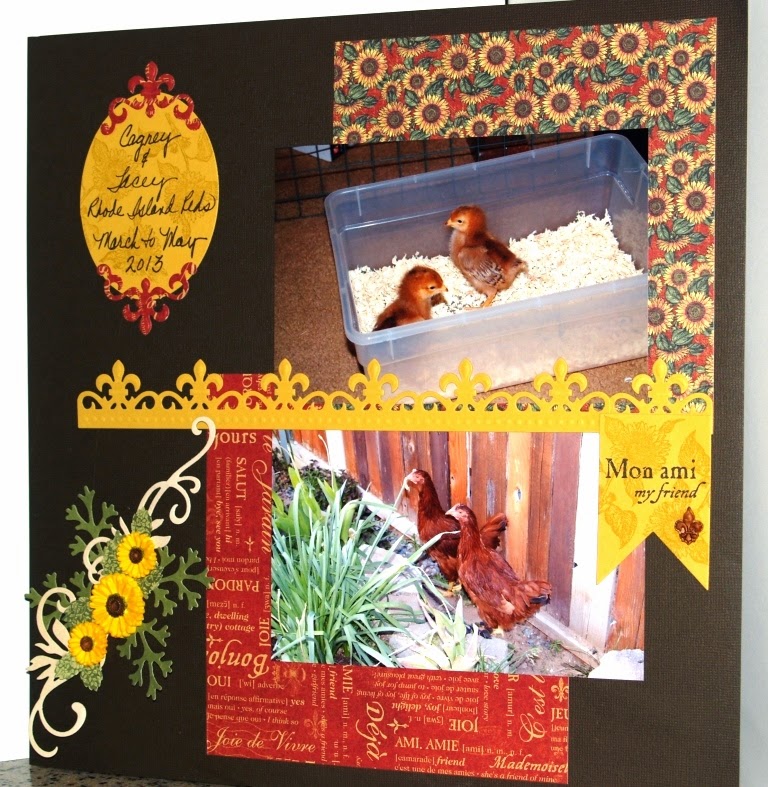
In the Kit-Tastic category for Camp Scrap we will be working with kits obviously. If you don't have any kits you can create your own using supplies you already have following a basic guideline. This first weeks session used 6x6 patterned papers, 3 neutral 8.5X11 sheets of cardstock and 2 colors of 8.5 x 11sheets of cardstock that coordinate with the 6x6 paper. Add some embellishments and 2 sheets of 12x12 cardstock to build your layout on and you were good to go. Have I mentioned that I have an entire drawer full of 6x6 paper pads, mostly untouched?
To create my kit I chose Graphic 45's French Country pad along with the coordinating stamps, StampinUp's cardstock in Cherry Cobbler, Hello Honey, Early Espresso, Very Vanilla and Crumb Cake. I created my own embellishments with silicone molds from Mod Podge and StampinUp's Simply Pressed Clay along with Copics and some Spellbinders dies. Added I piece of burlap from my stash.
I am very pleased with the 2 layouts and I'm thrilled to finally have the 2 youngest of my flock recorded for posterity.
Til next time...
To create my kit I chose Graphic 45's French Country pad along with the coordinating stamps, StampinUp's cardstock in Cherry Cobbler, Hello Honey, Early Espresso, Very Vanilla and Crumb Cake. I created my own embellishments with silicone molds from Mod Podge and StampinUp's Simply Pressed Clay along with Copics and some Spellbinders dies. Added I piece of burlap from my stash.I am very pleased with the 2 layouts and I'm thrilled to finally have the 2 youngest of my flock recorded for posterity.
Til next time...
Thursday, July 10, 2014
Never Too Old for Summer Camp
Wow! It has been forever since I last posted. So much has been going on and I never seem to have enough time to accomplish everything on my list. One of the things I have been doing is Art Journaling and Mixed Media. It has allowed me to be creative in a whole new way and use many of my tools and supplies that haven't seen the light of day.
I signed up for Camp Scrap 2014 with May Flaum which started last Monday and I am really enjoying it. I plan on doing the Art journaling projects on individual sheets of mixed media paper and then binding them all together when camp is done. Our 1st weeks challenge was to do something out of our comfort zone and/or use a product we are unfamiliar with.
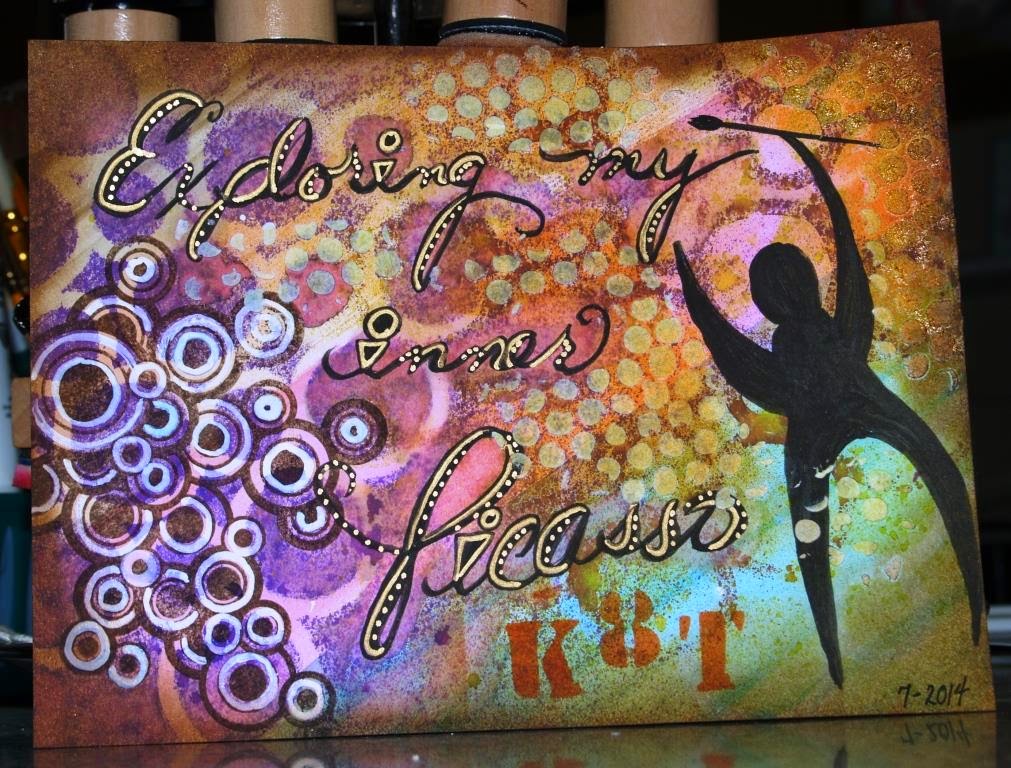
For the Art Journaling session I actually used my own hand writing which is something I never do. I started with a piece of mixed media paper and used gelatoes and a wet paintbrush to creat a rainbow background. It was beautiful. Then I used a stencil and some Dylusions spray in Crushed Grape on the left side, flipped the stencil and put it inky side down on the right. Note to Self... Dylusions are intense!!! It completely obliterated my pretty rainbow gelatoes. Live and learn... oh yeah, this is a class so I am supposed to be learning.
Next up was stamping the background stamp from WaltzingMouse Stamps with Wendy Vecchi Archival ink in Potting Soil in the lower left corner and enhancing the circles with a white paint marker. Second Note to Self... get a Faber-Castell Big Brush Artist Pen in white.
Used a Faber-Castell PITT artist pen in black to write my journaling and went over it a time or two to thicken the letters. Highlighted parts of the journaling with a Pilot Gold Marker. Doodled that bizarre creature with the paintbrush on the right with a black brush PITT pen. Added some texture with a Tim Holtz stencil and whipped spackle then used some distress ink once it was dry. Final steps were to stencil "K8T", ink the edges of the whole thing with distress ink and add the date.
Tomorrow I hope to post some projects from the Kit-tastic class.
Til next time...
I signed up for Camp Scrap 2014 with May Flaum which started last Monday and I am really enjoying it. I plan on doing the Art journaling projects on individual sheets of mixed media paper and then binding them all together when camp is done. Our 1st weeks challenge was to do something out of our comfort zone and/or use a product we are unfamiliar with.
For the Art Journaling session I actually used my own hand writing which is something I never do. I started with a piece of mixed media paper and used gelatoes and a wet paintbrush to creat a rainbow background. It was beautiful. Then I used a stencil and some Dylusions spray in Crushed Grape on the left side, flipped the stencil and put it inky side down on the right. Note to Self... Dylusions are intense!!! It completely obliterated my pretty rainbow gelatoes. Live and learn... oh yeah, this is a class so I am supposed to be learning.
Next up was stamping the background stamp from WaltzingMouse Stamps with Wendy Vecchi Archival ink in Potting Soil in the lower left corner and enhancing the circles with a white paint marker. Second Note to Self... get a Faber-Castell Big Brush Artist Pen in white.
Used a Faber-Castell PITT artist pen in black to write my journaling and went over it a time or two to thicken the letters. Highlighted parts of the journaling with a Pilot Gold Marker. Doodled that bizarre creature with the paintbrush on the right with a black brush PITT pen. Added some texture with a Tim Holtz stencil and whipped spackle then used some distress ink once it was dry. Final steps were to stencil "K8T", ink the edges of the whole thing with distress ink and add the date.Tomorrow I hope to post some projects from the Kit-tastic class.
Til next time...
Wednesday, July 9, 2014
Surprise!!! ... and a little WOYWW
Yes I'm back... again! Starting tomorrow I will be sharing projects I've been working on as well as projects from Camp Scrap 2014. Tomorrow's post is already done and scheduled and Friday's is in the works. For today I just wanted to say "Hi" and post a photo of my workdesk for "What's on your Workdesk Wednesday". I am a neat freak so this will need to be cleaned up soon or I'll go crazy.
Til next time...
Til next time...
Thursday, February 27, 2014
Share Your Project
Guess who is back and ready to blog again? To get back into the swing of things I am showing a project I made for a challenge sponsored by Scrapbookpal.com to use Spellbinders dies. I used Labels 4, Labels 4 Small, Gold Labels and Labels 17.
Other supplies used in this project are:
Paper, Ink, Butterfly Punch and stamp - StampinUp
All other stamps and dies - PapertreyInk
Til next time...
Subscribe to:
Posts (Atom)